Readme.txt v1.1
THIS IS OUT OF DATE! PLEASE OPEN THE INCLUDED README.TXT THANK YOU
Contents
- Overview
- Install
- Compositing Setup
- Scene Setup & Render
- Tips
Overview
Palette Studio is a Blender Add-On that simplifies creation of game sprites made from 3D renders. It provides palette selection, an 8-angle camera rig, and the ability to toggle the render alpha channel on and off.
This Add-On provides a streamlined method of generating sprites for games with limited palettes and multiple render angles such as DOOM. However, any palette file may be selected - providing infinite options for your indexed color creations!
Install
1) Copy "palette_studio.py" into the Blender Add-Ons folder.
ex: /Blender 2.91/2.91/scripts/addons/palette_studio.py
2) Launch Blender, open "Edit > Preferences", then search for "Palette Studio" in the Add-Ons section with the "Community" filter selected. Select the check box next to the Palette Studio plugin name.
Compositing Setup
1) Open the "Compositing" tab.
2) Check "Use Nodes" at the top of the node graph.
3) Add a "Render Layers" node.
4) Add a "Viewer" node, then connect the "Image" output from the "Render Layers" node to the "Image" input of the "Viewer" node.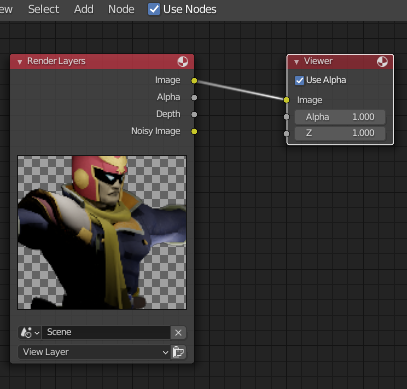
Note: You can add additional nodes between "Render Layers" and "Viewer" to modify the rendered output, such as Brightness/Contrast, Scaling, and Cropping.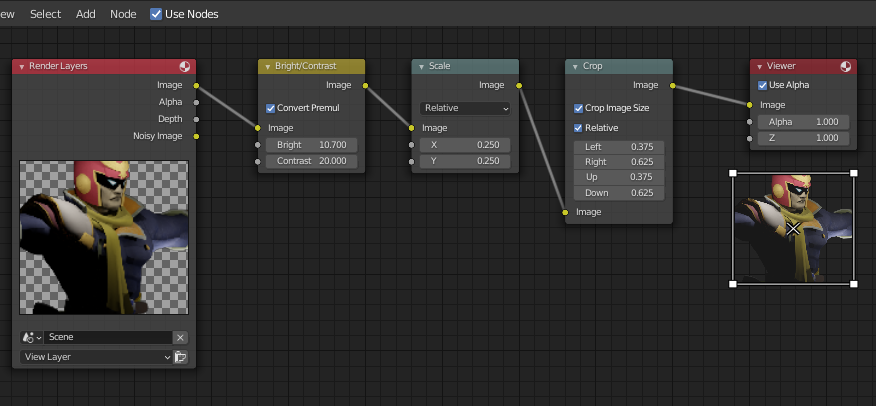
Scene Setup & Render
1) Open the "Layout" tab.
2) Select "Palette Studio" from the right-hand tools menu of the 3D View. If the tools menu is not visible, click on the small arrow or press N to expand the tools menu.
3) Press "Select Palette (.pal)" in the Palette panel and select a .pal file to use.
4) Select "Create" in the Camera Rig panel, then select any number of cameras to enable for rendering. The cameras in the rig are numbered 1-8 going counter-clockwise.
5) Move the "PS Camera Rig" object in the scene so the render subject is in the center of the camera rig. The "PS Camera Rig" object can be scaled to provide more space between the subject and the cameras, or it can also be rotated / translated to provide different views.
6) Select an output directory for the render file(s) by selecting the folder icon for "Out Dir" in the Render panel.
7) Enter a prefix for the render file name(s) in the "Prefix" field. Rendered images will be named the prefix, plus the number of the camera that captured the render.
ex: For a prefix of "TESTA" with all cameras enabled the rendered filenames will be "TESTA1", "TESTA2", "TESTA3", etc.
8) Select "Render". After some time, the render process will finish and the render file(s) will be available in the selected output directory.
Tips
- When rendering smaller images using a "Scale" node in the "Compositing" node graph, start with a larger output resolution (Output Properties > Dimensions > Resolution > X/Y) and scale down the image in clean multiples. This will provide smoother sprite coloring.
ex: For a 50x40 sprite, start with a output resolution of 250x200 then add a Scale node set to "0.2" between the "Render Layers" and "Viewer" node in the "Compositing" node graph.
- If only one rendered angle needs to be re-rendered, unselect all cameras except for the camera number matching the number on the output filename. Selecting "Render" will then re-render the one angle.